How to Remove a Camper Fridge: Tools and Steps Without Damaging Cabinets
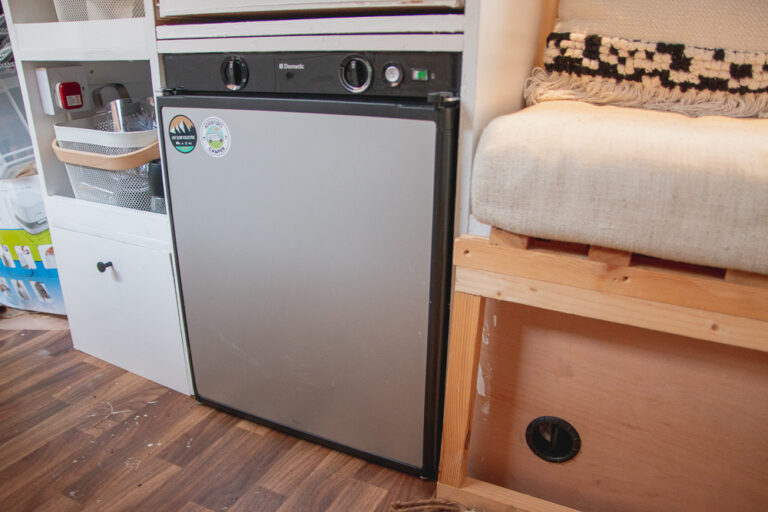
Removing an RV refrigerator takes 45 to 90 minutes, requires disconnecting three utility feeds, and calls for two people to lift the heavy cabinet safely.
What You Need Before You Start
Taking an absorption refrigerator out of a recreational vehicle requires basic hand tools, protective equipment, and a few specific safety items.
- Phillips head screwdriver (sizes #2 and #3)
- Flathead screwdriver or thin putty knife
- Open-end wrenches or flare nut wrenches (commonly 7/16-inch, 1/2-inch, and 5/8-inch)
- Non-contact voltage tester
- Certified gas leak detector solution or bubble spray
- Brass flare plug or cap (sized to match your specific rigid gas supply line)
- Cordless drill with driver bits
- Heavy-duty work gloves
- Moving blanket, thick cardboard sheet, or furniture sliders
- Painter’s tape and a permanent marker
Tip: Tape the exact screw locations directly to the removed trim pieces so you don’t confuse short cabinet wood screws with longer structural frame fasteners during reassembly.
How to Remove an RV Refrigerator Step by Step
Follow this sequence in exact order to protect your vehicle’s interior cabinetry and avoid dangerous fuel or electrical faults.
- Cut all utility supplies at the source. Switch off your RV’s 120-volt breaker panel switch for the refrigerator, disconnect the coach’s negative 12-volt battery terminal, and twist the main valve on your propane tank clockwise until it seats firmly closed.
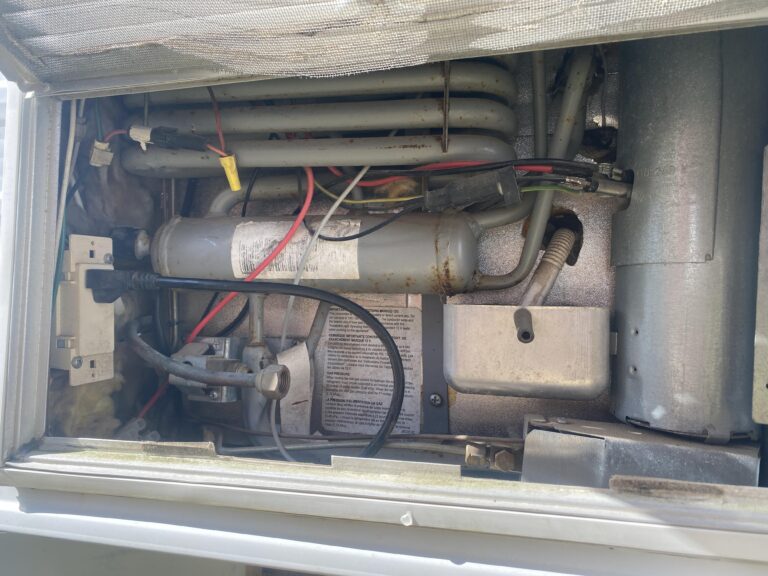
- Remove the exterior lower vent panel. Walk outside your camper, locate the louvered access door on the sidewall, twist the plastic retaining clips a quarter-turn, and tilt the plastic panel away from the vehicle frame.
- Verify and disconnect electrical feeds. Unplug the 3-prong 120-volt AC power cord from the dedicated wall receptacle inside the exterior compartment, then use an insulated screwdriver to loosen the positive and negative 12-volt DC terminal block screws, taping each wire end with electrical tape.
- Unhook and cap the LP gas line. Set a backup wrench on the refrigerator’s brass gas control valve fitting to hold it steady, place a second wrench on the flared supply line nut, turn the flare nut counterclockwise to detach the pipe, and immediately thread a matching brass flare plug into the vehicle’s open supply tube.
- Clear exterior mounting fasteners. Inspect the floor base and side baffles inside the outer compartment to locate the long wood or sheet-metal screws securing the metal refrigerator chassis to the plywood subfloor, and unscrew them completely.
- Pry off the interior frame screw covers. Move inside the living area, open both the freezer and fresh food doors, and pry off the plastic screw caps or decorative trim strips running down the left and right borders of the front face frame using a thin putty knife.
- Extract the front perimeter mounting screws. Back out every mounting screw hidden behind those trim strips, which anchor the outer perimeter flanges of the refrigerator chassis directly into the camper’s structural cabinet stile.
- Slide the cabinet forward onto floor protection. Lay a thick blanket or furniture slider flat against the bottom edge of the cabinet, grip the side edges of the refrigerator housing firmly, lift upward by roughly a half-inch to clear any floor lip, and slide the heavy steel unit straight forward into the aisle.
7 Best Camping Blankets for Cold Weather: Tested In Minus Temperature
Estimated Removal Times by Refrigerator Style
The refrigerator style determines the time and labor required. Absorption models require extra steps to detach flue exhaust pipes and gas supply tubes, whereas 12-volt compressor models require only basic DC wiring removal.
| Refrigerator Style | Typical Capacity | Time to Remove | Workers Required | Primary Disconnection Points |
|---|---|---|---|---|
| Compact 2-Way Absorption | 3 to 5 cu. ft. | 35–50 mins | 1 to 2 | 120V plug, 12V terminal, LP flare nut, 4 front screws |
| Standard 2-Way / 3-Way | 6 to 8 cu. ft. | 45–75 mins | 2 | 120V plug, 12V terminal, LP line, 6–8 perimeter screws |
| Large Double-Door Absorption | 10 to 12 cu. ft. | 60–90 mins | 2 to 3 | 120V plug, 12V terminal, LP line, upper/lower frame bolts |
| Modern 12V DC Compressor | 8 to 11 cu. ft. | 30–45 mins | 2 | Single 12V power harness, 4 to 6 face-frame screws |
| Residential Inverter Style | 10 to 18 cu. ft. | 60–100 mins | 2 to 3 | 120V plug, interior anchor brackets, transit travel latches |
Is It Safe to Disconnect the Gas Line Yourself?
Yes, detaching an LP gas line is safe for an ordinary owner if you turn off the propane cylinder valve, extinguish every pilot light, and cap the open line immediately. Camper gas systems operate at very low pressures, typically regulated to 11 inches of water column, which equals less than half a pound per square inch.
After you shut the valve on your external propane tank, step inside and light a stove burner on the galley range. Let the flame burn until it sputters out entirely. This simple step drains leftover line pressure between the tank regulator and the refrigerator control valve. Expect a brief hiss and odor of ethyl mercaptan when you loosen the flare nut.
Thread a solid brass flare plug into the vehicle’s line fitting and snug it tight with two wrenches. Once you complete the mechanical tasks, open the propane tank valve briefly and spray liquid gas-leak detector over the plugged joint to confirm no bubbling occurs. The federal safety limits established by the U.S. Consumer Product Safety Commission govern gas appliance and fuel fittings to prevent residential fires, and sealing open lines during component removal satisfies those core safeguards.
7 Best Camping Blankets for Cold Weather: Tested In Minus Temperature
How to Get the Fridge Out Through a Camper Door
Standard camper doors are 22 to 26 inches wide, while refrigerators are 23 to 25 inches deep. Remove exterior hardware to gain clearance.
Total Cabinet Depth: 24.5″
Minus Fresh Food Door: – 2.0″
Minus Freezer Door: – 2.0″
Minus Rear Coil Guard: – 0.75″
Net Clearance Depth: 19.75″ –> Clears 22″ Door Opening
Start by unscrewing the upper and lower door hinge pins using a standard screwdriver or small socket. Lift the freezer and refrigerator doors off their pivot pins and set them aside on a bunk. If the unit snags, remove the screen door by pulling its hinge pins.
When moving the unit through the opening, turn the chassis sideways so the cooling unit coils on the back lead the way. Have your helper stand on the ground outside the camper steps while you manage the weight from inside the entryway. Slide the base of the appliance onto the top step first, tip it backward slightly into your helper’s hands, and ease it down step by step to the ground.
Tip: If the entry door remains a quarter-inch too tight after unhinging both appliance doors, unscrew the plastic interior door-stop bumper and remove the screen door latch catch from the outer camper doorframe.
What Food to Take Camping Without a Fridge
A removed refrigerator leaves you without cold storage. You can use shelf-stable ingredients that require no power.
Dry Goods and Pantry Staples
Pack grain bases that cook quickly with minimal water. White rice, rolled oats, dry pasta, couscous, and instant grits survive hot camper temperatures without spoiling. Pair these staples with shelf-stable packets of dried lentils, split peas, or parboiled quinoa to maintain a balanced, hearty diet over a multi-day trip.
Canned and Pouch Proteins
Choose vacuum-sealed foil pouches of albacore tuna, pink salmon, and seasoned chunk chicken breast instead of heavy metal cans. Modern retort pouches require no can opener, pack completely flat in trash bags, and produce zero smelly fluids. Whole dry cured salamis, vacuum-packed summer sausages, and unopened hard cheeses like aged parmesan or sharp cheddar will easily keep at moderate ambient cabin temperatures for days.
Shelf-Stable Fresh Produce
Select hearty whole fruits and root vegetables that resist bruising and require no chilling before you cut into them:
- Russet, Yukon Gold, or sweet potatoes
- Yellow onions, shallots, and whole garlic heads
- Carrots, winter squash, and whole bell peppers
- Apples, oranges, bananas, and whole lemons
- Unripe avocados that soften progressively across the week
Pack farm-fresh eggs that haven’t been commercially washed, as they retain the natural cuticle that helps prevent bacterial entry.
What to Check When the Refrigerator Refuses to Budge
If the refrigerator remains stuck, check for hidden fasteners or sealant. Hidden fasteners or sealant often lock the housing to the framing.
Hidden Exterior Caulk or Foam Tape
Inspect the exterior access opening perimeter. Factories often use butyl tape or foam along the floor runners to draft-proof the compartment. Take a long utility knife or stiff putty knife and slice along the bottom seam between the refrigerator sheet-metal chassis and the wooden camper floor.
Upper Vent Screws or Baffle Brackets
Climb a ladder and look inside the upper roof or upper side-wall exterior vent. Certain tall refrigerator configurations use an upper metal Z-bracket that hooks over the top cooling coils to prevent the cabinet from tipping forward during sharp turns on the highway. Back out the 2 hex-head sheet metal screws holding that upper strap to the camper studding.
Sagging Subfloor Lip
The refrigerator shelf may sag over time due to road vibration. The refrigerator’s metal feet often drop into indentations in the subfloor. Set a flat pry bar under the front metal frame inside the camper, slide a thin scrap piece of sheet metal or masonite underneath, and pry upward gently so the feet glide smoothly over the floor lip.
Interior Cabinet Trim Pinch
Surrounding wood molding may settle tightly against the appliance sidewalls. If the cabinet face has bowed inward, loosen adjacent cabinet screws to relieve pressure.
Common Removal Mistakes and Fixes
Cabinet repairs and interior repairs quickly become expensive if you rush the mechanical extraction process.
Why Is There a Strong Gas Smell After Detaching the Line?
A lingering odor indicates the propane valve wasn’t closed or residual fuel remains in the lines. Close the cylinder valve tightly with a work glove. Ventilate the camper and avoid electrical switches or flames while the scent persists.
Why Did the 12-Volt Fuse Blow on the Main Converter Panel?
This short occurs when live 12-volt wires touch the metal chassis or gas tube. Disconnect the negative battery cable before loosening the terminal strip and cap all exposed wires.
Why Is the Exterior Wall Baffle Tearing Away with the Fridge?
Builders staple draft baffles to the sides of absorption refrigerators to direct airflow. Pulling the appliance forward with baffles still stapled to the wall will rip the paneling. Detach the baffles from the wall studs through the lower access door before sliding the cabinet out.
Why Won’t the Refrigerator Tilt Clear of the Ceiling?
Double-door units sit flush against roof cavities, leaving no clearance to tip the appliance. Keep the unit vertical on its slide rails until it clears the cabinet opening. Tilting the appliance prematurely will dent the ceiling headliner.
Frequently Asked Questions
Can one person safely remove a camper fridge alone?
No, small refrigerators weigh at least 75 pounds and larger double-door absorption units exceed 140 pounds without food inside. The awkward bulk, sharp sheet-metal edges, and tight doorway margins require one person to guide the front base while a second worker manages the weight and clears cabling from behind.
Do I need to drain the cooling unit before removal?
No, absorption cooling units are permanently welded, closed-loop steel systems containing pressurized ammonia, water, and hydrogen gas. Never attempt to drain, unscrew, or puncture any tubes on the rear cooling coil network, as escaping anhydrous ammonia vapors cause severe chemical burns and permanent respiratory injury.
What should I do with the disconnected propane line?
Thread a solid brass flare plug or brass cap into the vehicle’s copper supply line flare fitting and tighten it using two wrenches. Never rely on an open shut-off valve or a taped line end; a mechanical brass seal prevents accidental gas discharge if someone opens the propane tank valve later.
Can I run a camper fridge on an open trailer after removal?
Yes, but absorption units must sit completely level on both horizontal axes to operate without destroying their internal boiler tubes. If you power the unit outside the camper on 120-volt AC power to test it, check the top shelf with a bubble level and adjust your work surface until it reads true.
How do I cap the 12-volt wires left behind?
Snip any exposed frayed copper strands clean, twist a plastic wire nut clockwise over each conductor end, and wrap high-grade vinyl electrical tape tightly around the nut and wire jacket. Label the wires clearly with painter’s tape so you instantly identify positive and negative poles when installing a new appliance.
Will sliding the fridge damage my camper vinyl flooring?
The bare metal chassis base has sharp corners and screw heads that can gouge vinyl or scratch laminate flooring. To protect your floors, place a heavy piece of corrugated cardboard or a woven moving rug directly in front of the cabinet before sliding the unit out.
Once the old unit is out, take a moment to vacuum the empty compartment and inspect the surrounding cabinetry for any hidden water damage. You’ll be glad you checked for leaks before sliding your new appliance into place. It’s a great way to ensure your kitchen stays fresh and ready for the road.