How To Hook Up Camper Sway Bars? (And How to Fix Your Bar Setup in 10 Minutes)
Mount brackets, connect sway bars, set correct tension, and test alignment on level ground.
If you want a smoother, safer tow, learning how to hook up camper sway bars is worth it. I’ve set up dozens of rigs in the real world, from light travel trailers to long toy haulers. In this guide, I’ll show you how to hook up camper sway bars the right way, with clear steps, pro tips, and the mistakes to avoid. Read on to tow with confidence.
Why is My Camper AC Leaking Inside? 10 Common Culprits & Quick Fixes
What Sway Bars Do, And Which Type You Have
Sway bars help keep your trailer in line when wind, road crown, or passing trucks push it. They resist side-to-side motion and help your tow vehicle stay stable. You can have standalone friction sway control or a weight distribution hitch (WDH) with built-in sway control.
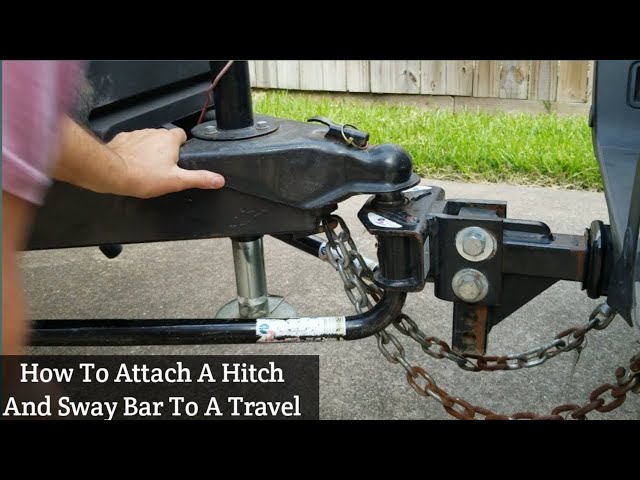
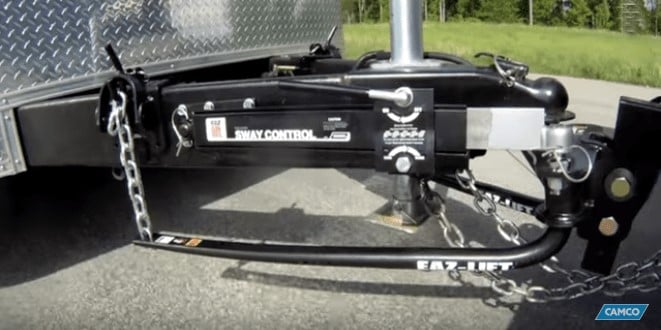
- Friction sway control uses a bar with a friction pad and arm. It bolts between the hitch ball mount and a small ball on the trailer’s A-frame.
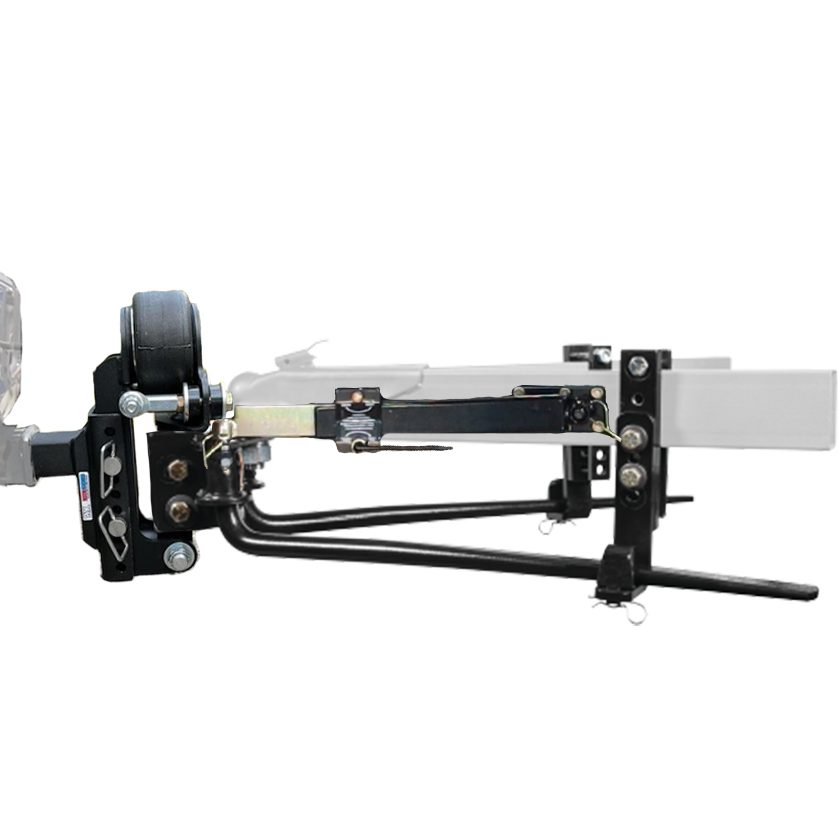
- WDH with integrated sway control uses spring bars (trunnion or round) and brackets on the trailer frame. Some add cams or 4-point friction surfaces.
If you are not sure which you have, check your hitch head and the trailer A-frame. A small extra ball on the passenger side often means a friction sway bar. Big L-shaped bars and frame brackets often mean a WDH with sway control. This matters for how to hook up camper sway bars.

Tools And Prep Checklist
Good prep makes the hookup fast and safe. Gather a few basics before you start.
- Tape measure to track fender heights before and after hookup
- Torque wrench and sockets for hitch bolts and ball nuts
- 3/4-inch or 1-inch wrench for brackets and friction handles
- Grease for hitch ball and spring bar sockets (if required)
- Blocks or wheel chocks to keep the trailer still
- Gloves and eye protection for safety
Set up on level ground. Chock the wheels. Read the hitch and vehicle manuals. That is the smart path for how to hook up camper sway bars.
Step-By-Step: How To Hook Up Camper Sway Bars
Hook up the trailer to the tow vehicle first. Lower the coupler onto the hitch ball. Latch it. Cross the safety chains under the coupler. Plug in the 7-way connector. Raise the tongue jack a bit to shift some weight off the bars before you attach them.
If You Have A Friction Sway Control Bar
- Install the A-frame plate. Bolt it to the trailer frame at the maker’s distance from the coupler. The small sway control ball faces the passenger side.
- Mount the sway control ball on your hitch platform. It sits beside the main hitch ball.
- Attach the sway bar. One end slips over the small ball on the A-frame. The other end clamps to the hitch ball plate.
- Set the handle tension. Turn the handle until snug. Add a small extra turn to start. You will fine-tune after a short drive.
- Pin the on/off slide. Make sure the locking pin clips secure the bar to both balls.
- Test low-speed turns. The bar should resist sway but still allow smooth turning.
If You Have A WDH With Integrated Sway Control
- Insert spring bars. Slide each bar into the hitch head until it locks.
- Position frame brackets. Place L-brackets or chain snap-up brackets at the maker’s set distance from the coupler.
- Lift the bars. Use the tongue jack to raise the back of the truck and the front of the trailer together. Then lever the bars onto the brackets or hook chains with the snap-up tool. This reduces strain on you and your gear.
- Balance front axle height. Measure your truck’s front fender height before and after. Aim to return near the unhitched height. Some drop is okay; too much rise is not.
- Tighten head tilt or washers as needed. More tilt or more links under tension equals more weight transfer and more built-in sway control.
- Secure all pins and clips. Check that bars sit flat on L-brackets or that chains align straight.
These steps cover how to hook up camper sway bars on the most common systems. Take your time. Small tweaks make a big difference on the road.

How to Keep a Cooler Cold While Camping: 11 Simple Tricks That Actually Work
Set Tension, Test, And Fine-Tune
Set friction or spring bar tension to match your trailer weight and road feel. Then test on a quiet road.
- Friction sway bars. Start with the handle snug plus a small turn. If the trailer wiggles in crosswinds, add a bit more. If it binds on slow tight turns or groans a lot, back it off.
- WDH with sway control. Adjust head tilt, washer count, or chain links. More engagement equals more control, up to the maker’s limit.
- Verify axle balance. Your front truck axle should not lift compared to unhitched. Many makers advise bringing it back close to the baseline height.
- Road test. Drive 5–10 miles at low to mid speeds. Hit a few curves. Re-check pins, clips, and tension after the test.
Good tuning is the heart of how to hook up camper sway bars. You want firm control without harsh binding.
Common Mistakes To Avoid
Even seasoned RVers slip up. Here are the most frequent errors I see when folks learn how to hook up camper sway bars.
- Skipping the tongue jack lift when loading spring bars. This adds stress and can cause injury.
- Mounting the A-frame plate in the wrong spot. Wrong distance reduces leverage and control.
- Over-tightening friction sway. It can bind in parking lots and cause jackknife risk while backing.
- Under-tightening everything. Loose bolts, loose brackets, and loose bars make sway worse.
- Ignoring weights. Too much tongue weight or too little both hurt sway control. Aim for 10–15% tongue weight.
Fix the basics first. Your hitch works best when the rig is balanced and tight.
Real-World Tips From The Road
I learned the hard way on a windy stretch near Amarillo. I had rushed the setup and left the friction sway a bit loose. A passing semi gave me a wiggle I did not like. I pulled off, added a quarter-turn, and the rest of the day felt calm. That small tweak changed the trip.
When you teach a friend how to hook up camper sway bars, share these tips:
- Use painter’s tape marks on the A-frame to repeat your best bracket spot.
- Keep a small torque chart in your glove box for hitch bolts and balls.
- Recheck after fuel stops on day one. Metal settles. Pins can walk.
- If rain starts, check friction settings. Wet pads may slip a bit more.
Little habits build confidence mile after mile.
Maintenance, Storage, And Seasonal Checks
Your sway setup needs light care. A few minutes keeps it ready for the next trip.
- Grease where the maker says. Some WDH pivot points need a dab. Keep grease off friction pads.
- Inspect pads and brackets. Look for glazing, grooves, or cracks.
- Check torque on hitch ball, head bolts, and frame brackets at the start of each season.
- Cover or store friction bars inside when not in use. Keep dust and salt off them.
- Replace worn parts. Do not cheap out on safety gear.
This upkeep supports long-term success with how to hook up camper sway bars and keeps your tow smooth.
Safety And Legal Notes
Safety rules vary by state and province. Speed limits while towing differ too. Many makers state you should reduce friction or remove the sway bar before backing into tight campsites. Always follow your hitch manual first.
Weight ratings are law. Do not exceed your tow vehicle ratings, hitch class, or tire load limits. Safe limits matter as much as how to hook up camper sway bars.

Frequently Asked Questions of how to hook up camper sway bars
Can I back up with a friction sway bar attached?
Often yes for gentle straight backs, but many makers advise removing it for tight maneuvers. If you feel binding, stop and remove it.
How tight should my friction sway handle be?
Start snug plus a small extra turn. Road test, then adjust in small steps until sway is controlled without binding.
Do I need sway control if I have a WDH?
Many WDH systems have built-in sway control. If yours does not, you may add a friction sway bar if the hitch allows it.
How do I know if my bars are set right?
Measure your front fender height before and after. It should return near unhitched height, and the rig should feel stable at highway speeds.
Can sway bars fix bad loading or low tongue weight?
No. They help, but poor loading still causes sway. Aim for 10–15% tongue weight and even side-to-side balance.
What tools do I need to hook up at a campsite?
Carry gloves, a snap-up tool, a small wrench for the friction handle, and a flashlight. A compact torque wrench is a plus.
Is it normal to hear noises from my WDH?
Light creaks are normal, especially on 4-point friction hitches. Loud pops or grinding may mean wrong tension or dry contact points.
Conclusion
You now know how to hook up camper sway bars with confidence. Set the hardware right, tune the tension, and verify balance with a short test drive. Small, steady tweaks make the biggest gain in control.
Take action on your next hitch-up: measure, adjust, and road test. If this guide helped, share it with a fellow RVer, subscribe for more towing tips, or drop your questions in the comments.